
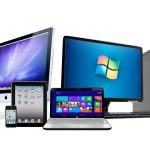
 All In One PC


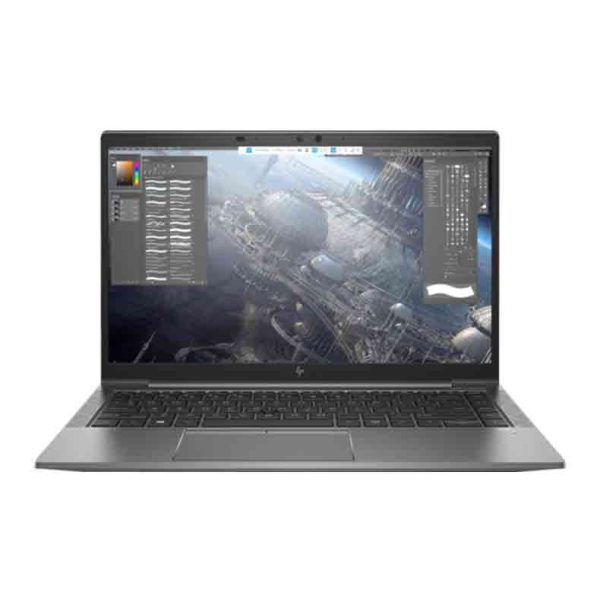

Microsoft Windows 11 Pro
Microsoft Windows 11 Pro
Apple Shopping Event
Hurry and get discounts on all Apple devices up to 20%
Sale_coupon_15
95.00$
19
People watching this product now!
-
 Pick up from the Woodmart Store
To pick up today
Free
-
 Courier delivery
Our courier will deliver to the specified address
2-3 Days
Free
-
 DHL Courier delivery
DHL courier will deliver to the specified address
1-3 Days
Free
-
 Warranty 1 year
-
 Free 30-Day returns
Payment Methods:
Description
Technical Specification
 Overview
| Brand |
Microsoft |
|---|
 Print technology
| Aperture | |
|---|---|
| Audio Capability | |
| Bottle Color | |
| Bottleneck | |
| Brand | |
| Compression Technology | |
| Depth | |
| Display Resolution Maximum | |
| Duplex | |
| Height | |
| IR Range | |
| Keyboard | |
| Lens | |
| Main Camera | |
| Management of Server | |
| Material | |
| Maximum Resolution | |
| Memory | |
| Network | |
| OS | |
| Power Supply | |
| Print Media | |
| Printing Technology | |
| Processor | |
| RAID | |
| Refresh Rate | |
| Resolution | |
| SIP Account | |
| SIP Accounts | |
| Screen Option | |
| Screen size | |
| Screen Type | |
| Selfie Camera | |
| Size | |
| Special Feature | |
| Storage | |
| Support | |
| Water and Dust Resistant | |
| Weight | |
| Width | |
| Brand |
Microsoft |
 Special features
| Aperture | |
|---|---|
| Audio Capability | |
| Bottle Color | |
| Bottleneck | |
| Brand | |
| Compression Technology | |
| Depth | |
| Display Resolution Maximum | |
| Duplex | |
| Height | |
| IR Range | |
| Keyboard | |
| Lens | |
| Main Camera | |
| Management of Server | |
| Material | |
| Maximum Resolution | |
| Memory | |
| Network | |
| OS | |
| Power Supply | |
| Print Media | |
| Printing Technology | |
| Processor | |
| RAID | |
| Refresh Rate | |
| Resolution | |
| SIP Account | |
| SIP Accounts | |
| Screen Option | |
| Screen size | |
| Screen Type | |
| Selfie Camera | |
| Size | |
| Special Feature | |
| Storage | |
| Support | |
| Water and Dust Resistant | |
| Weight | |
| Width | |
| Brand |
Microsoft |
 Print speed black (ISO, A4)
| Aperture | |
|---|---|
| Audio Capability | |
| Bottle Color | |
| Bottleneck | |
| Brand | |
| Compression Technology | |
| Depth | |
| Display Resolution Maximum | |
| Duplex | |
| Height | |
| IR Range | |
| Keyboard | |
| Lens | |
| Main Camera | |
| Management of Server | |
| Material | |
| Maximum Resolution | |
| Memory | |
| Network | |
| OS | |
| Power Supply | |
| Print Media | |
| Printing Technology | |
| Processor | |
| RAID | |
| Refresh Rate | |
| Resolution | |
| SIP Account | |
| SIP Accounts | |
| Screen Option | |
| Screen size | |
| Screen Type | |
| Selfie Camera | |
| Size | |
| Special Feature | |
| Storage | |
| Support | |
| Water and Dust Resistant | |
| Weight | |
| Width | |
| Brand |
Microsoft |
 Ports
Ports
| Aperture | |
|---|---|
| Audio Capability | |
| Bottle Color | |
| Bottleneck | |
| Brand | |
| Compression Technology | |
| Depth | |
| Display Resolution Maximum | |
| Duplex | |
| Height | |
| IR Range | |
| Keyboard | |
| Lens | |
| Main Camera | |
| Management of Server | |
| Material | |
| Maximum Resolution | |
| Memory | |
| Network | |
| OS | |
| Power Supply | |
| Print Media | |
| Printing Technology | |
| Processor | |
| RAID | |
| Refresh Rate | |
| Resolution | |
| SIP Account | |
| SIP Accounts | |
| Screen Option | |
| Screen size | |
| Screen Type | |
| Selfie Camera | |
| Size | |
| Special Feature | |
| Storage | |
| Support | |
| Water and Dust Resistant | |
| Weight | |
| Width | |
| Brand |
Microsoft |
 Features
| Aperture | |
|---|---|
| Audio Capability | |
| Bottle Color | |
| Bottleneck | |
| Brand | |
| Compression Technology | |
| Depth | |
| Display Resolution Maximum | |
| Duplex | |
| Height | |
| IR Range | |
| Keyboard | |
| Lens | |
| Main Camera | |
| Management of Server | |
| Material | |
| Maximum Resolution | |
| Memory | |
| Network | |
| OS | |
| Power Supply | |
| Print Media | |
| Printing Technology | |
| Processor | |
| RAID | |
| Refresh Rate | |
| Resolution | |
| SIP Account | |
| SIP Accounts | |
| Screen Option | |
| Screen size | |
| Screen Type | |
| Selfie Camera | |
| Size | |
| Special Feature | |
| Storage | |
| Support | |
| Water and Dust Resistant | |
| Weight | |
| Width | |
| Brand |
Microsoft |
 Connectivity
| Aperture | |
|---|---|
| Audio Capability | |
| Bottle Color | |
| Bottleneck | |
| Brand | |
| Compression Technology | |
| Depth | |
| Display Resolution Maximum | |
| Duplex | |
| Height | |
| IR Range | |
| Keyboard | |
| Lens | |
| Main Camera | |
| Management of Server | |
| Material | |
| Maximum Resolution | |
| Memory | |
| Network | |
| OS | |
| Power Supply | |
| Print Media | |
| Printing Technology | |
| Processor | |
| RAID | |
| Refresh Rate | |
| Resolution | |
| SIP Account | |
| SIP Accounts | |
| Screen Option | |
| Screen size | |
| Screen Type | |
| Selfie Camera | |
| Size | |
| Special Feature | |
| Storage | |
| Support | |
| Water and Dust Resistant | |
| Weight | |
| Width | |
| Brand |
Microsoft |
 Features
| Aperture | |
|---|---|
| Audio Capability | |
| Bottle Color | |
| Bottleneck | |
| Brand | |
| Compression Technology | |
| Depth | |
| Display Resolution Maximum | |
| Duplex | |
| Height | |
| IR Range | |
| Keyboard | |
| Lens | |
| Main Camera | |
| Management of Server | |
| Material | |
| Maximum Resolution | |
| Memory | |
| Network | |
| OS | |
| Power Supply | |
| Print Media | |
| Printing Technology | |
| Processor | |
| RAID | |
| Refresh Rate | |
| Resolution | |
| SIP Account | |
| SIP Accounts | |
| Screen Option | |
| Screen size | |
| Screen Type | |
| Selfie Camera | |
| Size | |
| Special Feature | |
| Storage | |
| Support | |
| Water and Dust Resistant | |
| Weight | |
| Width | |
| Brand |
Microsoft |
 Battery
| Aperture | |
|---|---|
| Audio Capability | |
| Bottle Color | |
| Bottleneck | |
| Brand | |
| Compression Technology | |
| Depth | |
| Display Resolution Maximum | |
| Duplex | |
| Height | |
| IR Range | |
| Keyboard | |
| Lens | |
| Main Camera | |
| Management of Server | |
| Material | |
| Maximum Resolution | |
| Memory | |
| Network | |
| OS | |
| Power Supply | |
| Print Media | |
| Printing Technology | |
| Processor | |
| RAID | |
| Refresh Rate | |
| Resolution | |
| SIP Account | |
| SIP Accounts | |
| Screen Option | |
| Screen size | |
| Screen Type | |
| Selfie Camera | |
| Size | |
| Special Feature | |
| Storage | |
| Support | |
| Water and Dust Resistant | |
| Weight | |
| Width | |
| Brand |
Microsoft |
Customer Reviews
Related Products
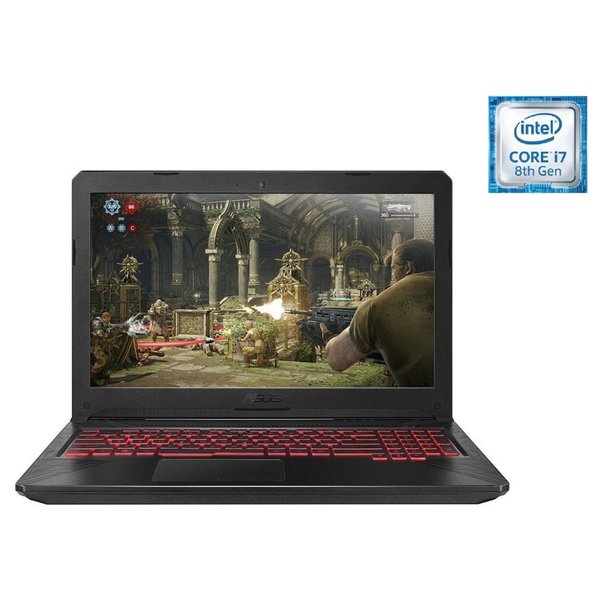
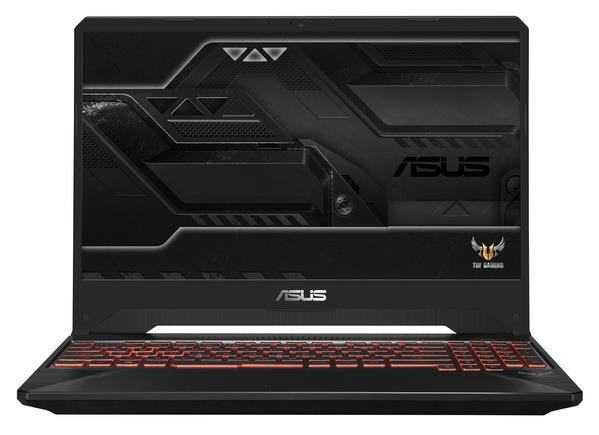
Asus FX505GD-BQ138T laptop
Out of stock
327.62$
SKU:
FX505GD-BQ138T
| Weight | 1.68 kg |
|---|---|
| Aperture | |
| Audio Capability | |
| Bottle Color | |
| Bottleneck | |
| Brand | |
| Compression Technology | |
| Depth | |
| Display Resolution Maximum | |
| Duplex | |
| Height | |
| IR Range | |
| Keyboard | |
| Lens | |
| Main Camera | |
| Management of Server | |
| Material | |
| Maximum Resolution | |
| Memory | |
| Network | |
| OS | |
| Power Supply | |
| Print Media | |
| Printing Technology | |
| Processor | |
| RAID | |
| Refresh Rate | |
| Resolution | |
| SIP Account | |
| SIP Accounts | |
| Screen Option | |
| Screen size | |
| Screen Type | |
| Selfie Camera | |
| Size | |
| Special Feature | |
| Storage | |
| Support | |
| Water and Dust Resistant | |
| Weight | |
| Width |
Asus FX505GM-ES085T laptop
Out of stock
446.76$
SKU:
FX505GM-ES085T
| Weight | 2.2 kg |
|---|---|
| Aperture | |
| Audio Capability | |
| Bottle Color | |
| Bottleneck | |
| Brand | |
| Compression Technology | |
| Depth | |
| Display Resolution Maximum | |
| Duplex | |
| Height | |
| IR Range | |
| Keyboard | |
| Lens | |
| Main Camera | |
| Management of Server | |
| Material | |
| Maximum Resolution | |
| Memory | |
| Network | |
| OS | |
| Power Supply | |
| Print Media | |
| Printing Technology | |
| Processor | |
| RAID | |
| Refresh Rate | |
| Resolution | |
| SIP Account | |
| SIP Accounts | |
| Screen Option | |
| Screen size | |
| Screen Type | |
| Selfie Camera | |
| Size | |
| Special Feature | |
| Storage | |
| Support | |
| Water and Dust Resistant | |
| Weight | |
| Width |
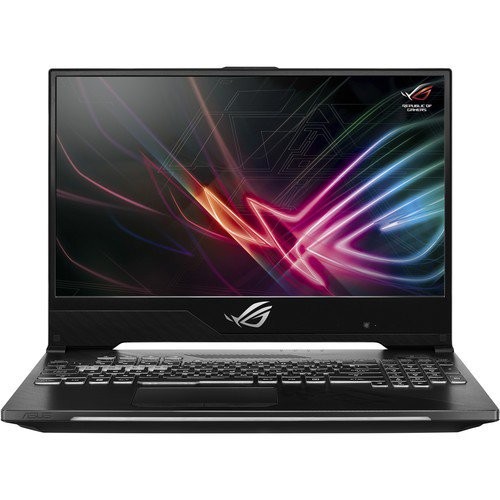
Asus GL504GM-ES215T laptop
Out of stock
558.51$
SKU:
GL504GM-ES215T
| Weight | 2.4 kg |
|---|---|
| Aperture | |
| Audio Capability | |
| Bottle Color | |
| Bottleneck | |
| Brand | |
| Compression Technology | |
| Depth | |
| Display Resolution Maximum | |
| Duplex | |
| Height | |
| IR Range | |
| Keyboard | |
| Lens | |
| Main Camera | |
| Management of Server | |
| Material | |
| Maximum Resolution | |
| Memory | |
| Network | |
| OS | |
| Power Supply | |
| Print Media | |
| Printing Technology | |
| Processor | |
| RAID | |
| Refresh Rate | |
| Resolution | |
| SIP Account | |
| SIP Accounts | |
| Screen Option | |
| Screen size | |
| Screen Type | |
| Selfie Camera | |
| Size | |
| Special Feature | |
| Storage | |
| Support | |
| Water and Dust Resistant | |
| Weight | |
| Width |
LENOVO ThinkPad X1 4G Carbon laptop
Out of stock
691.04$
SKU:
20KH006CAD
| Weight | 2.13 kg |
|---|---|
| Aperture | |
| Audio Capability | |
| Bottle Color | |
| Bottleneck | |
| Brand | |
| Compression Technology | |
| Depth | |
| Display Resolution Maximum | |
| Duplex | |
| Height | |
| IR Range | |
| Keyboard | |
| Lens | |
| Main Camera | |
| Management of Server | |
| Material | |
| Maximum Resolution | |
| Memory | |
| Network | |
| OS | |
| Power Supply | |
| Print Media | |
| Printing Technology | |
| Processor | |
| RAID | |
| Refresh Rate | |
| Resolution | |
| SIP Account | |
| SIP Accounts | |
| Screen Option | |
| Screen size | |
| Screen Type | |
| Selfie Camera | |
| Size | |
| Special Feature | |
| Storage | |
| Support | |
| Water and Dust Resistant | |
| Weight | |
| Width |

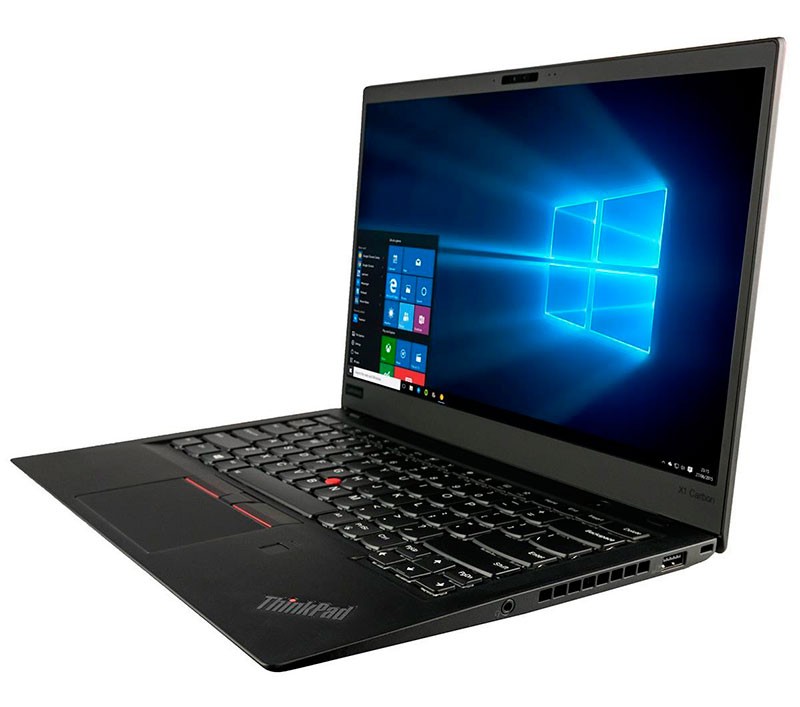
LENOVO ThinkPad X1 Carbon laptop
Out of stock
525.72$
SKU:
20KH0004AD
| Weight | 2.13 kg |
|---|---|
| Aperture | |
| Audio Capability | |
| Bottle Color | |
| Bottleneck | |
| Brand | |
| Compression Technology | |
| Depth | |
| Display Resolution Maximum | |
| Duplex | |
| Height | |
| IR Range | |
| Keyboard | |
| Lens | |
| Main Camera | |
| Management of Server | |
| Material | |
| Maximum Resolution | |
| Memory | |
| Network | |
| OS | |
| Power Supply | |
| Print Media | |
| Printing Technology | |
| Processor | |
| RAID | |
| Refresh Rate | |
| Resolution | |
| SIP Account | |
| SIP Accounts | |
| Screen Option | |
| Screen size | |
| Screen Type | |
| Selfie Camera | |
| Size | |
| Special Feature | |
| Storage | |
| Support | |
| Water and Dust Resistant | |
| Weight | |
| Width |
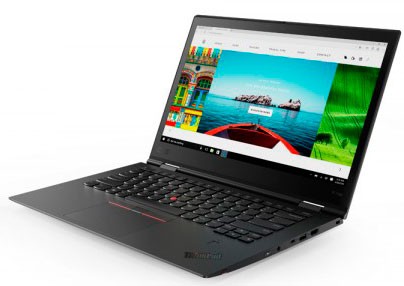
LENOVO ThinkPad X1 Yoga 20LD0034AD laptop
Out of stock
676.01$
SKU:
20LD0034AD
| Weight | 3.628 kg |
|---|---|
| Aperture | |
| Audio Capability | |
| Bottle Color | |
| Bottleneck | |
| Brand | |
| Compression Technology | |
| Depth | |
| Display Resolution Maximum | |
| Duplex | |
| Height | |
| IR Range | |
| Keyboard | |
| Lens | |
| Main Camera | |
| Management of Server | |
| Material | |
| Maximum Resolution | |
| Memory | |
| Network | |
| OS | |
| Power Supply | |
| Print Media | |
| Printing Technology | |
| Processor | |
| RAID | |
| Refresh Rate | |
| Resolution | |
| SIP Account | |
| SIP Accounts | |
| Screen Option | |
| Screen size | |
| Screen Type | |
| Selfie Camera | |
| Size | |
| Special Feature | |
| Storage | |
| Support | |
| Water and Dust Resistant | |
| Weight | |
| Width |